There is some progress on the garden bench project.
It's all about tenons this time.
Making the side rails between front and rear legs is part of this stage of the project.
I had to make four side rails. The stock was prepped quickly. I had some left overs from the workbench build. The material was already squared, so I had only to cut it to length, adjust the thickness and to square the ends.
 |
| Cutting the rails to final length |
For cutting the rails to length I have made a knife line all around the perimeter and a little groove on the face side were I started sawing.
 |
| The ends straight of the saw |
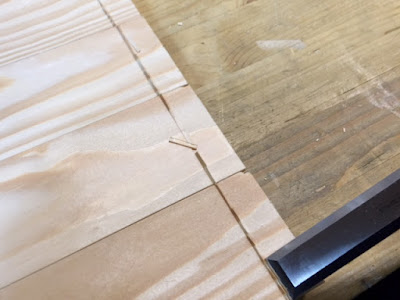
Marking the cut this way has become one of my working routines. The v-groove helps a lot to start the cut straight and the knife lines all around give a good registration. My saw cuts are not plumb right of the saw, but I managed it to reduce the work on the shooting board. Nevertheless, the shooting board was the next stage so that I had, not pretty, but square ends for the tenon layout.
 |
| Laying out the tenons |
To layout the tenons I have used the same setting for the marking gauge as for the legs. Apart from the distance of course.
 |
| All tenons laid out |
In this project I have changed my working routine a little bit. In the past I have often worked from joint to joint. This time I have tried to make always the same step at all pieces. Means, laying out all tenons at this point.....
 |
| Preparing the V groove for the shoulder cuts |
....then preparing all shoulder cut lines.....
 |
| All shoulder cuts done |
....sawing all shoulders....and so on. I think you got the idea.
All this done, the question came up if I should saw or split the cheeks of the tenon. I gave splitting a try.
 |
| Splitting the tenon cheeks |
And it went extremely well. Good luck on me. The grain is pretty straight so that it split more or less perpendicular.
 |
| The first tenon right from the chisel |
The first tenon came out pretty well straight form the chisel. That is the result of just splitting it. I'm amazed.
 |
| It's self supporting |
Watch this. It is self supporting on the first try. As a last step I have trimmed the tenon width.
 |
| And finally sitting pretty close |
And finally the tenon fits and the joint is sitting pretty well.
The next 14 cheeks have been made in the same way. And all of them does fit pretty well. I only had to trim the tenon width a little bit. Finally all joints are sitting well, apart from one shoulder. Don't know what happened, but it is a tad low. I've tried to correct it, with moderate success. It is the inside of one upper rail which will never been seen again. So I decided not to worsen it.
Finally I got the outside frames ready.
 |
| Outside frames complete |
Next I will care about the front and back rails. As always, stock prepping is the first step.....
 |
| Nice continuous shavings of the front rail |
What's Next?
Now then, I mentioned it already. The stock for the front, back and crest rail will be prepared and then I will make the tenons exactly the same way as described above. That done the main frame for the bench will be ready. Further tasks are, making two arm rests and preparing a lot of back slats.
Watch the space to see the next stages.
Take care!
Stefan


Getting a tenon to fit at first try is such a good feeling.
ReplyDeleteThe project is coming along nicely.
Frohe Oster
Gruss
Jonas
Hi Jonas,
Deletethanks for the kind words.
Jep, you are right. That felt really good. And encouraged to go forward. But it is quite clear that the grain was with me this time ;-)
Happy Easter to you and your family.
Gruss
Stefan
Looking just great!
ReplyDeleteAnd the last picture is such a tease for the plane... I really 'need' to put my hands on one of those continental wooden planes! :D :D
Olá António,
Deletethanks.
Oh yes you should try one of these planes ;-)
This one is my daily user now. At least when it comes to finer shavings.
But it is not only the plane itself. A lot has changed with changing my sharpening routine.
Cheers,
Stefan
Stefan,
ReplyDeleteEnough with the tease about changing your sharpening routine :-). What have you changed?
The work looks really nice and clean.
ken
Hi Ken,
Deletethanks for your kind words.
Alright then, have a look at this weeks post at Wednesday.
Cheers,
Stefan
Great work. now waiting for the tenons finish. it seems like you have already put an extra effort while designing this garden bench. Keep doing the awesome work dude!
ReplyDeleteThanks a lot!
Delete